How to make Border backgrounds.
You can save your backgrounds in either gif or jpg form once you have them just right!
You start with a blank border or space, you can save this one...

It should be 900-1000 pixels long and 100-200 pixels tall.
You can also save borders on the web that are free to use and are aloud to be changed. I keep a file of them, they are different sizes and then I just paint over the graphic and then ad my own as I want to.
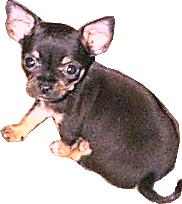
Then you find a photo or graphic you want to use on your border. You can use a graphic with a background already or you can cut it out, it is up to you. I have chosen my chihuahua, and cut her out of the photo...

Once you have your graphic and border files open, you click on the border and make it come up, then click on your graphic at the bottom of your screen and hold down the button and drag it to your border. If you can't see the graphic well, then click the border to become bigger, to do this, there are little boxes down in your right bottom corner, click there. Then arrange the graphic to the size and place you want it! This is when I ad shadow or flip it or what ever I want.
You should have a finshed basic background that looks like this....

You can change the border any way you choose. You don't have to start over, just leave your graphic there and click the middle of the border. When the little resize balls show up around the border, you are ready to ad texture, color, or pictures! Here are a few examples....

Here I filled the border with color clicking "PAINT & COLOR EFFECTS/FILL WITH SOLID COLOR". I chose purple. Then I didn't want it plain, so I added a texture using one of the filters in PI2000, under "SPECIAL EFFECTS/ILLUSIONS" and click down them till I find something I like. To add the little bar onto the border for a more finished look, I click the background again, the click on TEXT/ADD TEXT, I choose a font that has an I or L as just a line. Then I click "APPLY SPECIAL EFFECTS/FILL TEXT WITH COLOR, GRADIENT OR PICTURE/COLOR GRADIENT". Go to the box marked 2)CLICK A STYLE, then choose the line looking style close to the bottom, it is the 6th one from the botton. You then have to color it to fit your border by clicking the box right above style, "CUSTOM 2-COLOR GRADIENT", when choosing your colors, one has to be dark and one has to be light to give it that shaded look.

This one I just added light text onto the background.

This one I stretched the "L" out to make it cover the side. You will have to bring your graphic forward to be able to see it here. To do this click "SIZE & POSITION/MOVE FORWARD OR BACKWARD", then click on the dog picture to your right hand side and click BRING FOWARD". Now you can see the doggies once again!

This one I added a picture to the border as the background. To do this once again click on your border to work on, then you will click "CUTOUTS & PICTURES/FILL CUTOUT OR PICTURE/PICTURE/OPEN PICTURE", find a picture you like that is somewhere on your hard drive. This one is from the "PICTURE IT 2000 CD", under "TEXTURES/PAPER". Once you click open picture, it will show up, you can then resize it and click done. Now you can recolor it to fit what you want by clicking "PAINT & EFFECT/CHANGE COLOR", then move the outer ball on the color wheel till you find the color you like.